Creating a Flow Policy (In to Out)
Once you’ve created the server connector, you can create a new “in to out” flow policy.
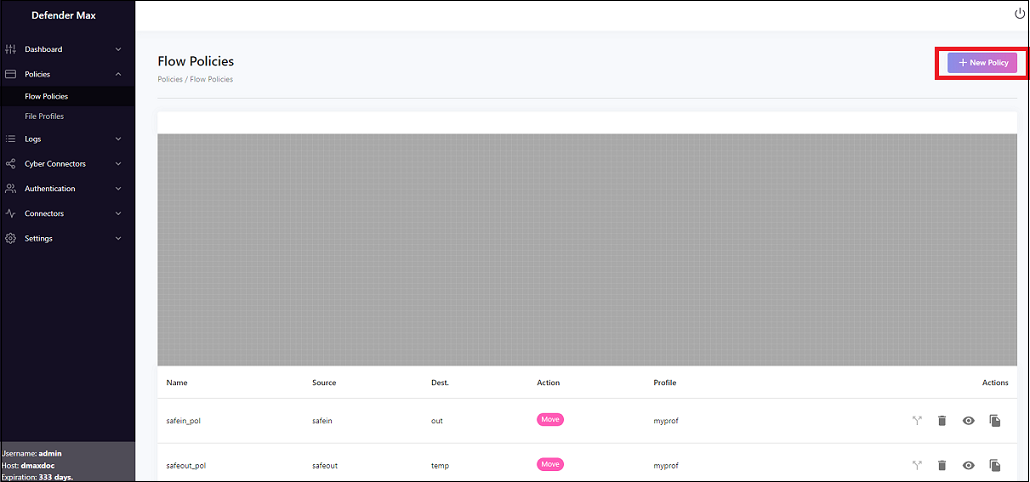
- Go to Policies > Flow Policies > + New Policy.
- The options here can be set as follows:
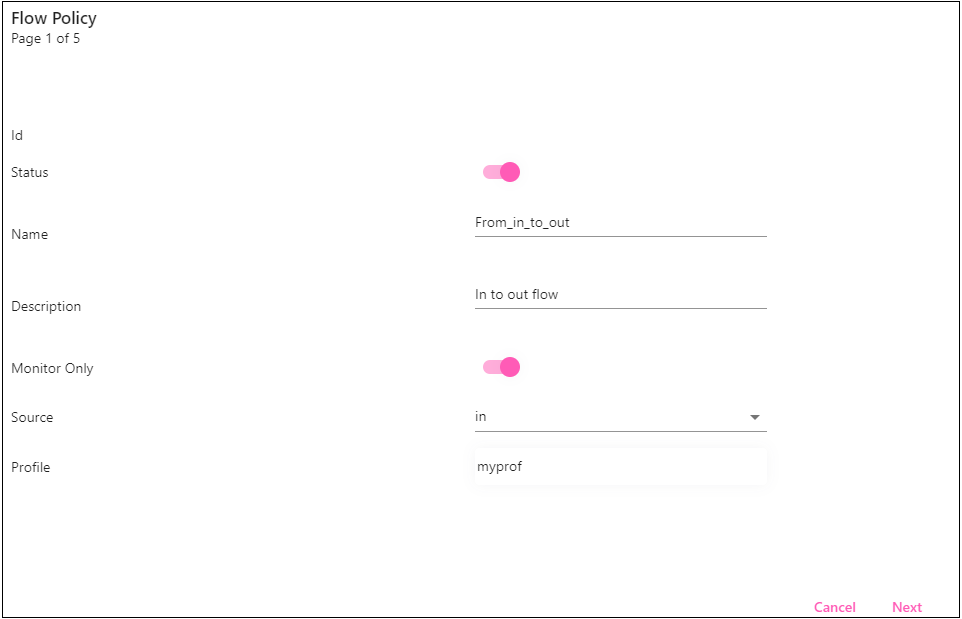
- Name: Set a Name for the policy; for example, From_in_to_out.
- Description: Enter a description of the policy here.
- Monitor Only: Here you can set a source/lead destination folder, and then set it to monitor/scan the files for viruses, at a selected time interval.
- Source: Select the source of the server you’re working with; in this example, in.
- Profile: This should be the profile that you set up previously.
- Click Next. Note that if in the previous screen you selected Monitor Only, you won’t be able to enter the destination here. If you disabled that option, you can enter the destination here.
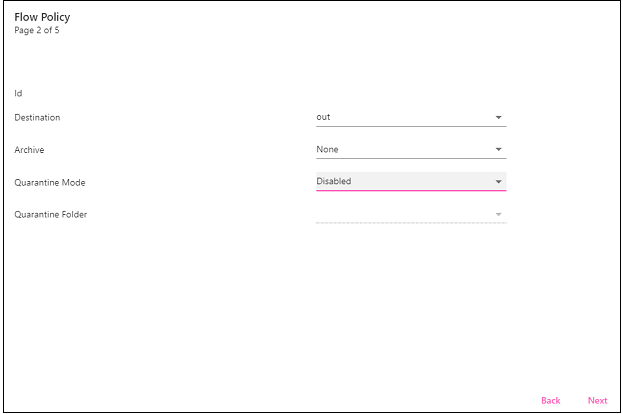
- Here you can select out for the Destination.
- Enable Quarantine Mode if you want to set a quarantine folder for your quarantined files.
- Click Next.
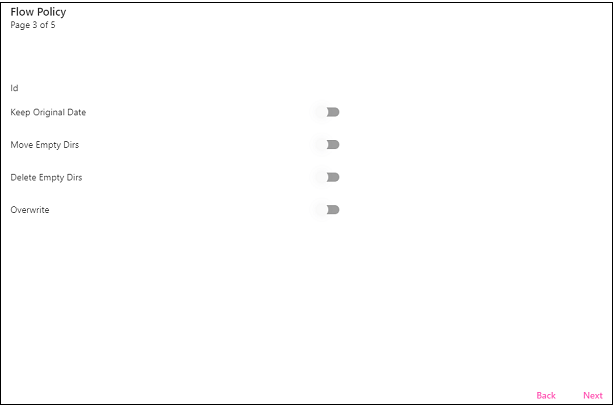
- Keep Original Date means that if you move the file, it will keep today’s date as the date.
- Use Move Empty Dirs if, for example, you want to have an empty folder within the in folder, and thus keep the same structure.
- The Delete Empty Dirs field can be used to delete empty directories/folders from the in folder, once you’ve moved them.
- Use Overwrite if you want to, for example, overwrite the files in out with what you move from in, or make a copy instead.
- Click Next.
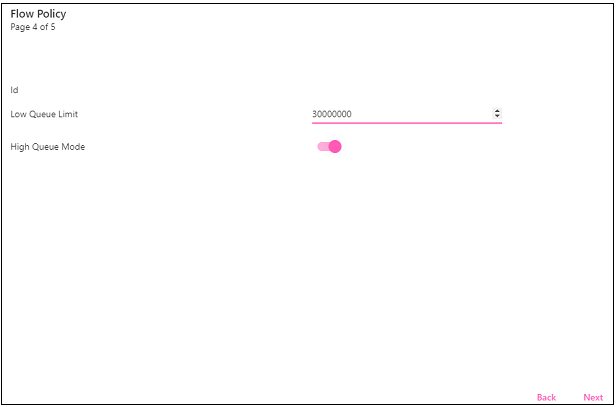
- Turn on High Queue Mode to set a limit on larger files so that they have a separate queue. Doing so means that the larger files won’t affect or slow down smaller files that you’re trying to move. You can then enter the Low Queue Limit (numerical limit) that you want to set for this (in the example above, 30 MB).
- Click Next.
- The options here can be set as follows:
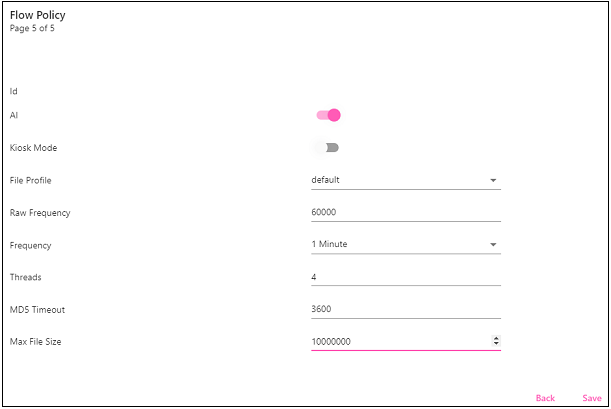
- File Profile: Lets you set the types of files that you want to transfer (for example, only PDF files, or to exclude all Word files). The default is all files. See theCreating a File Policy section below for additional information on how to set file profiles.
- Frequency: Set a frequency for how often you want to sample the files. The default is 1 minute. Once you enter this, the corresponding Raw Frequency (in milliseconds) will automatically be set as well.
- Threads: Set how many threads work on this policy, or how many files in parallel you want to transfer.
- MD5 Timeout: Set (in seconds) the amount of time to wait until scanning each file. If you set this to one day, for example, the platform will wait one day, and then scan the files again.
- Max File Size: Set the maximum file size to transfer. If you set this to 10 MB (10000000), for example, it will block anything over 10 MB; it won’t transfer the file. Note that if you leave this value at 0, it will be set to 10 GB (i.e., it is not unlimited).
- Click Save when finished.