Cloud Connectors - Azure
To create and configure a cloud connector with Azure, you will first need to create and configure a storage account in Azure.
- In the Microsoft Azure portal, go to Storage Accounts.

- Click + Create to create a new storage account.
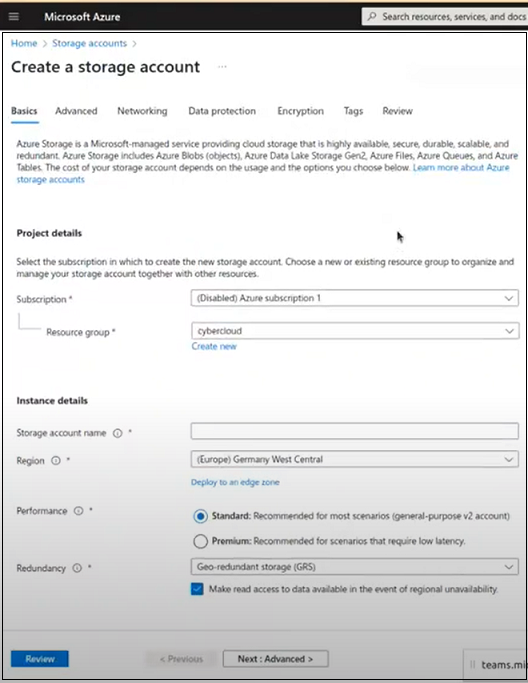
- Enter a Storage account name.
- Click Next: Advanced at the bottom.
- On the next screen, make sure Enable hierarchical namespace is selected. Note that Defender Max only supports Gen2 endpoints.
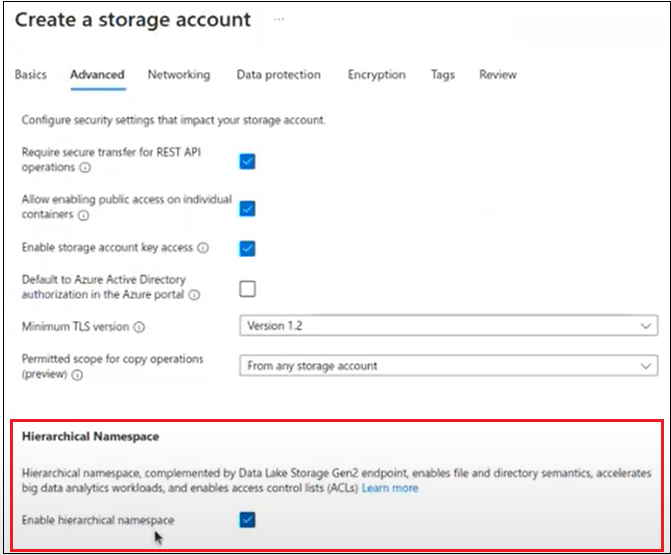
- Click Next at the bottom and go through all of the remaining tabs. Leave the default selections there.
- In Defender Max, go to Connectors > Cloud > + New Cloud Connector.

- Enter a Name for the connector; for example, azureblob_in.
- Enter a Description.
- In the Folder field, you can set this to bring in or out only files from a designated folder.
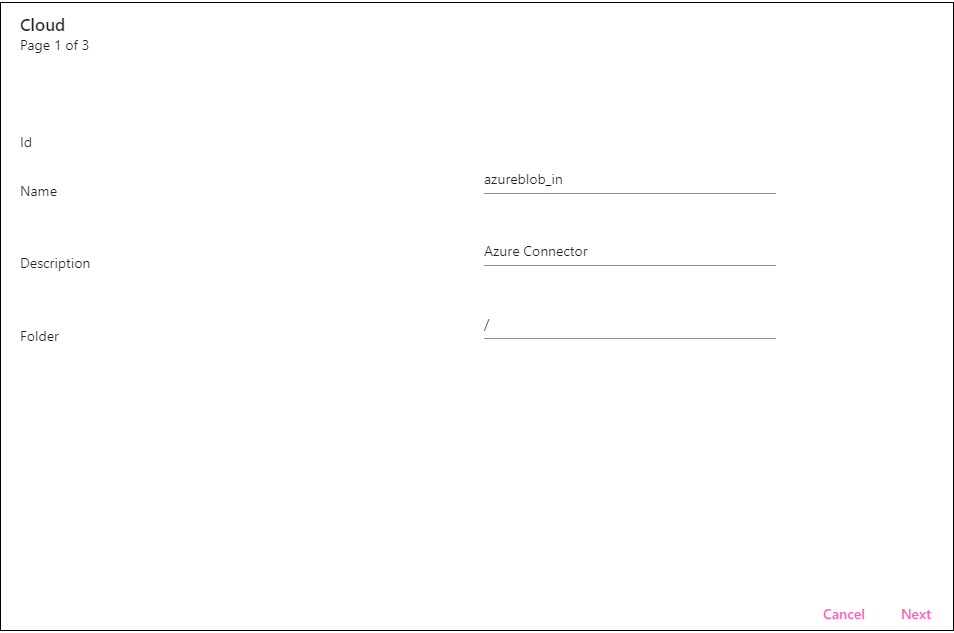
- Click Next.
- Here we’ll select Azure as the cloud service.
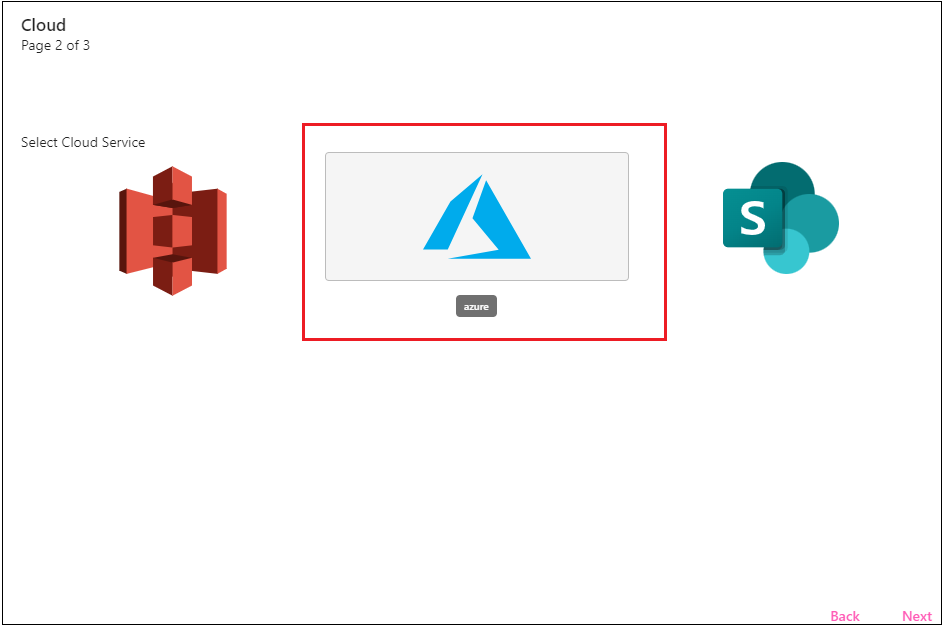
- Click Next.
- You can now bring over the information that you created in Azure.
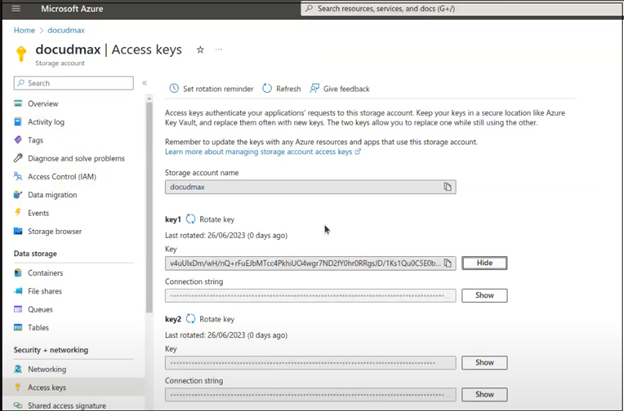
- In Defender Max, the Account Name field is the Storage account name you created in Azure.
- The Account Key field is the Key from Azure.
- The Container field is taken from the Containers section of Azure. Create a container there using the Containers tab, and then use that name in the Container field in Defender Max.
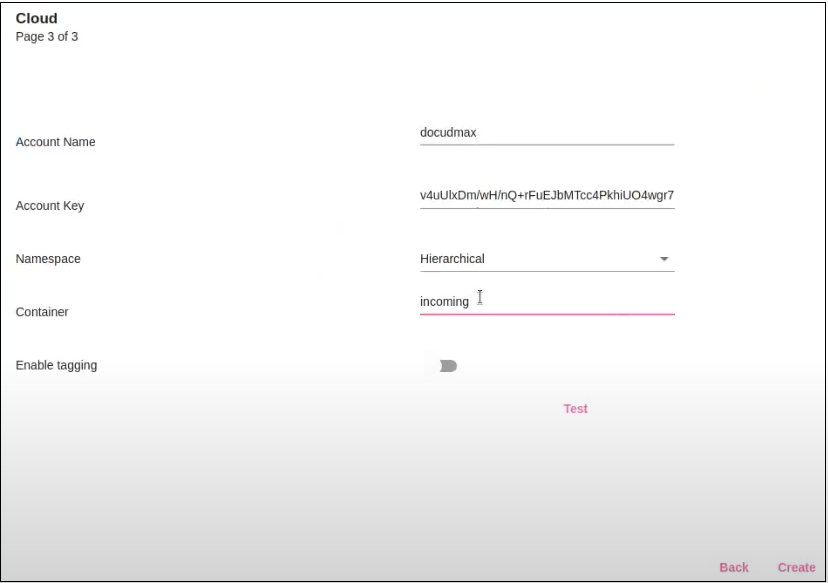
- Click Test to make sure the test passed.
- You will now see your Azure connector in the Cloud Connectors page.
[block:image]
{
"images": [
{
"image": [
"https://files.readme.io/9a34374-AzureStorageAccounts6.png",
null,
null
][ "https://files.readme.io/9a34374-AzureStorageAccounts6.png", null, null ],
"align": "center"
}
]
}
[/block] - Go back to the flow policy in Defender Max (Policies > Flow Policies), select the relevant source and destination.
- Click Apply. You will now connect to Azure, where you can take the file, check for viruses, and move the file to (for example) your organization’s SFTP server. You can check the Traffic Log to see if the file was successfully transferred.
Updated 12 months ago
