Cloud Connector - Sharepoint
connection to sharepoint using azure applications
Connect SharePoint to Dmax by registering an Azure application and configuring a cloud connector.
Create an Azure Application
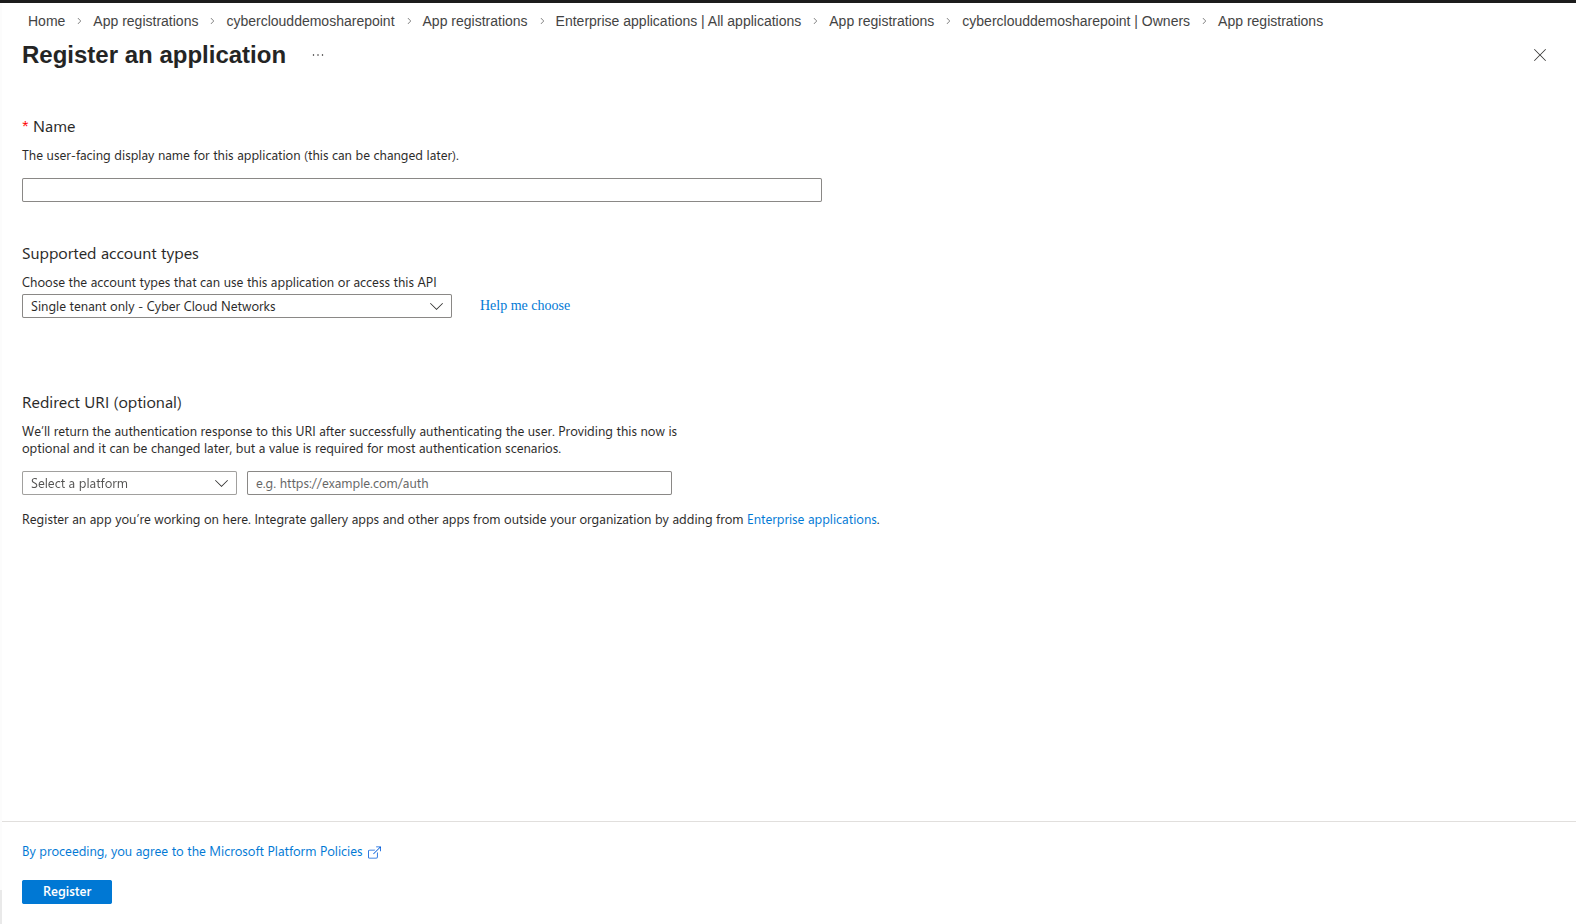
- Open the Azure App Registrations page.
- Click New Registration.
- Enter a display name, select Single tenant, and click Register.
- Open the application you just registered.
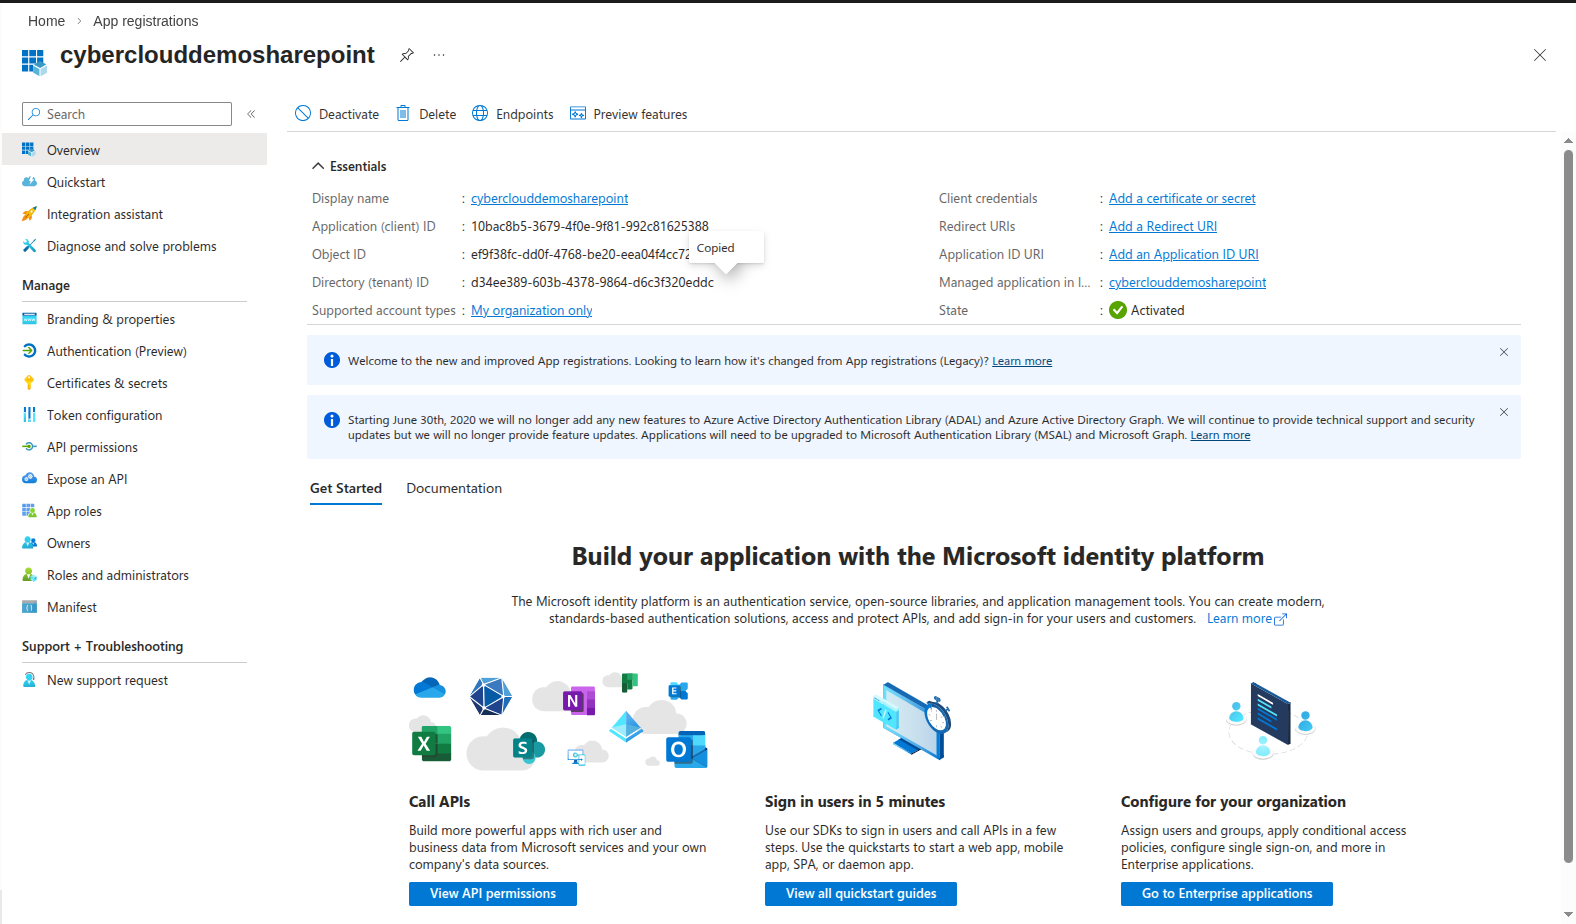
Copy the Application (client) ID and Directory (tenant) ID from the overview page — you'll need both when configuring the Dmax connector.
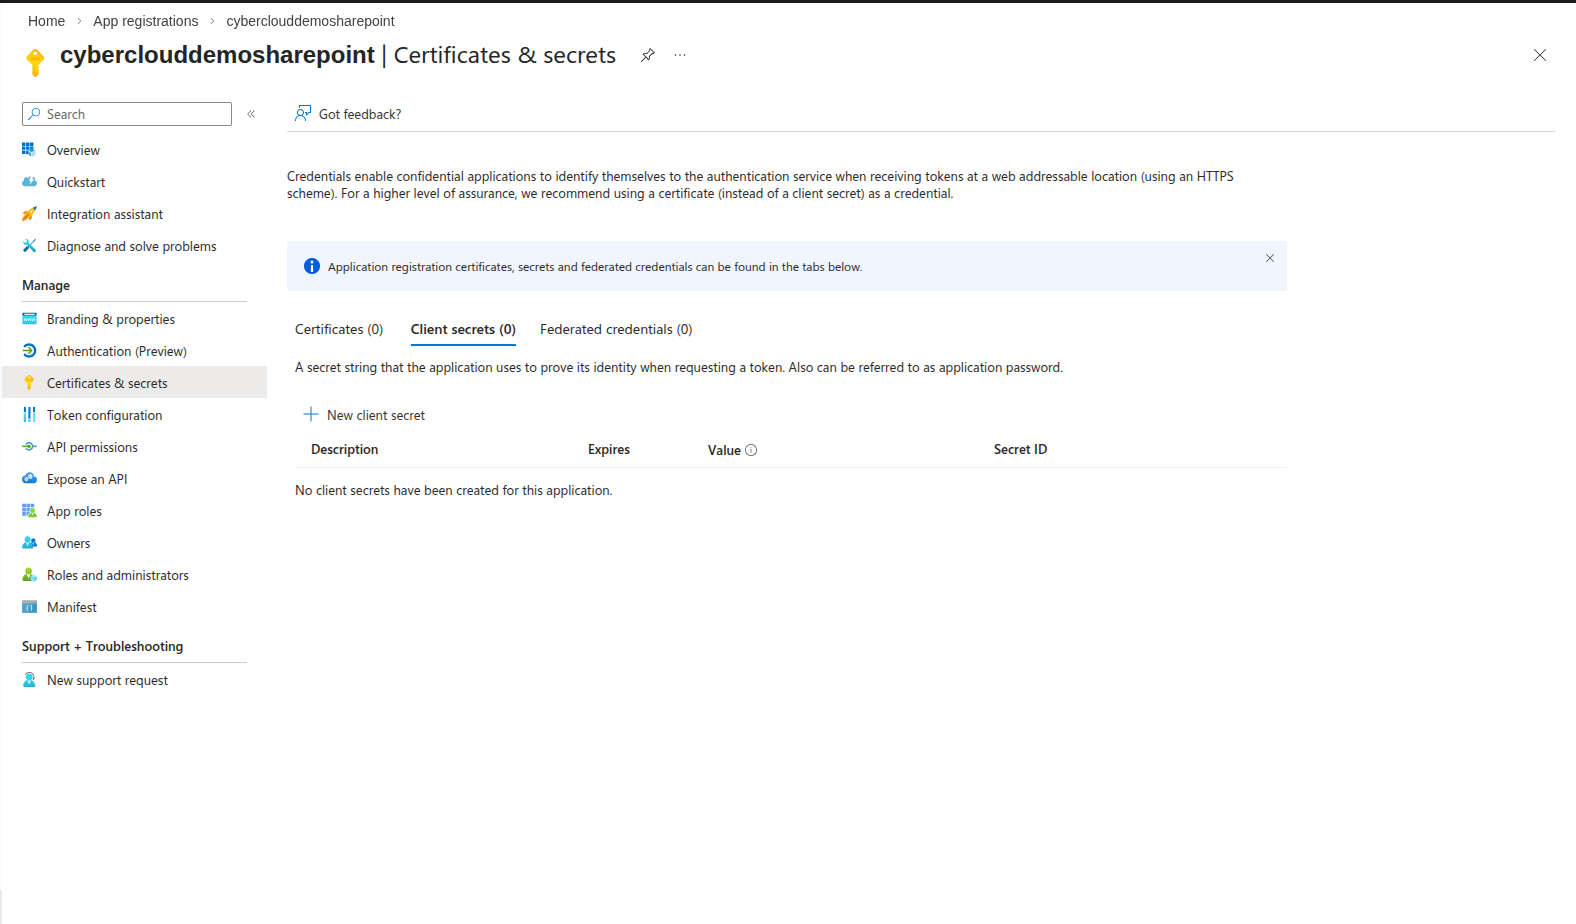
- Go to Certificates & secrets and select the Certificates tab.
- Generate a new certificate and key using OpenSSL:
openssl req -x509 -sha256 -nodes -days 365 -newkey rsa:2048 -keyout server.key -out server.crt- Upload the
server.crtcertificate to the Azure app.
- Go to API permissions and add the SharePoint permission Sites.ReadWrite.All.
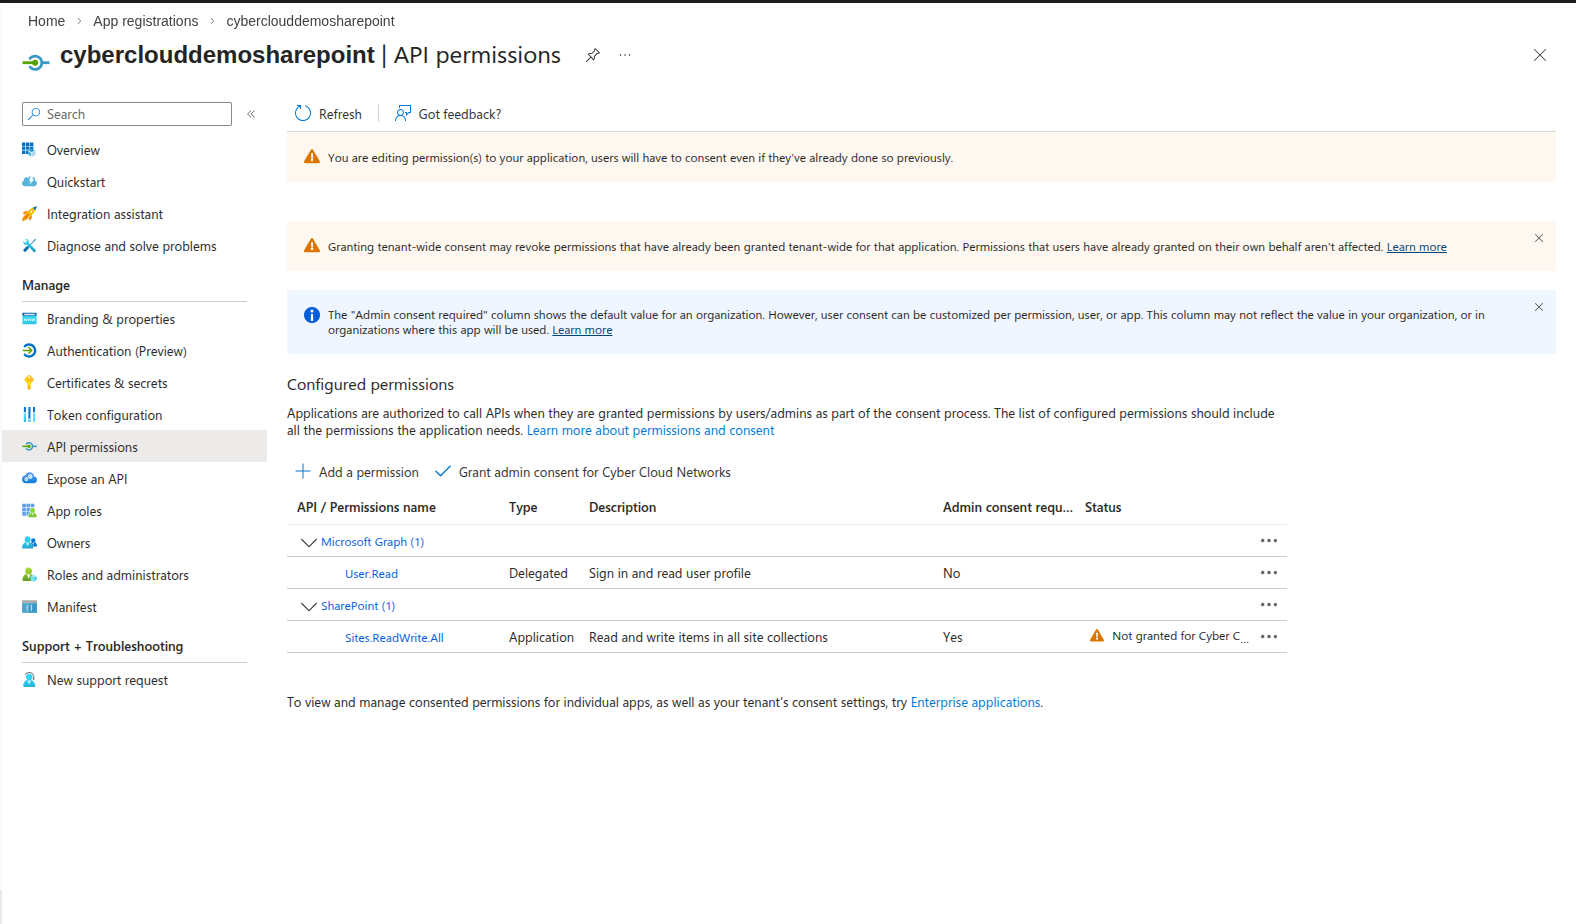
- Click Grant admin consent to activate the permission.
Configure the Dmax Cloud Connector
- In Dmax, go to Connectors > Cloud and click New Cloud Connector.
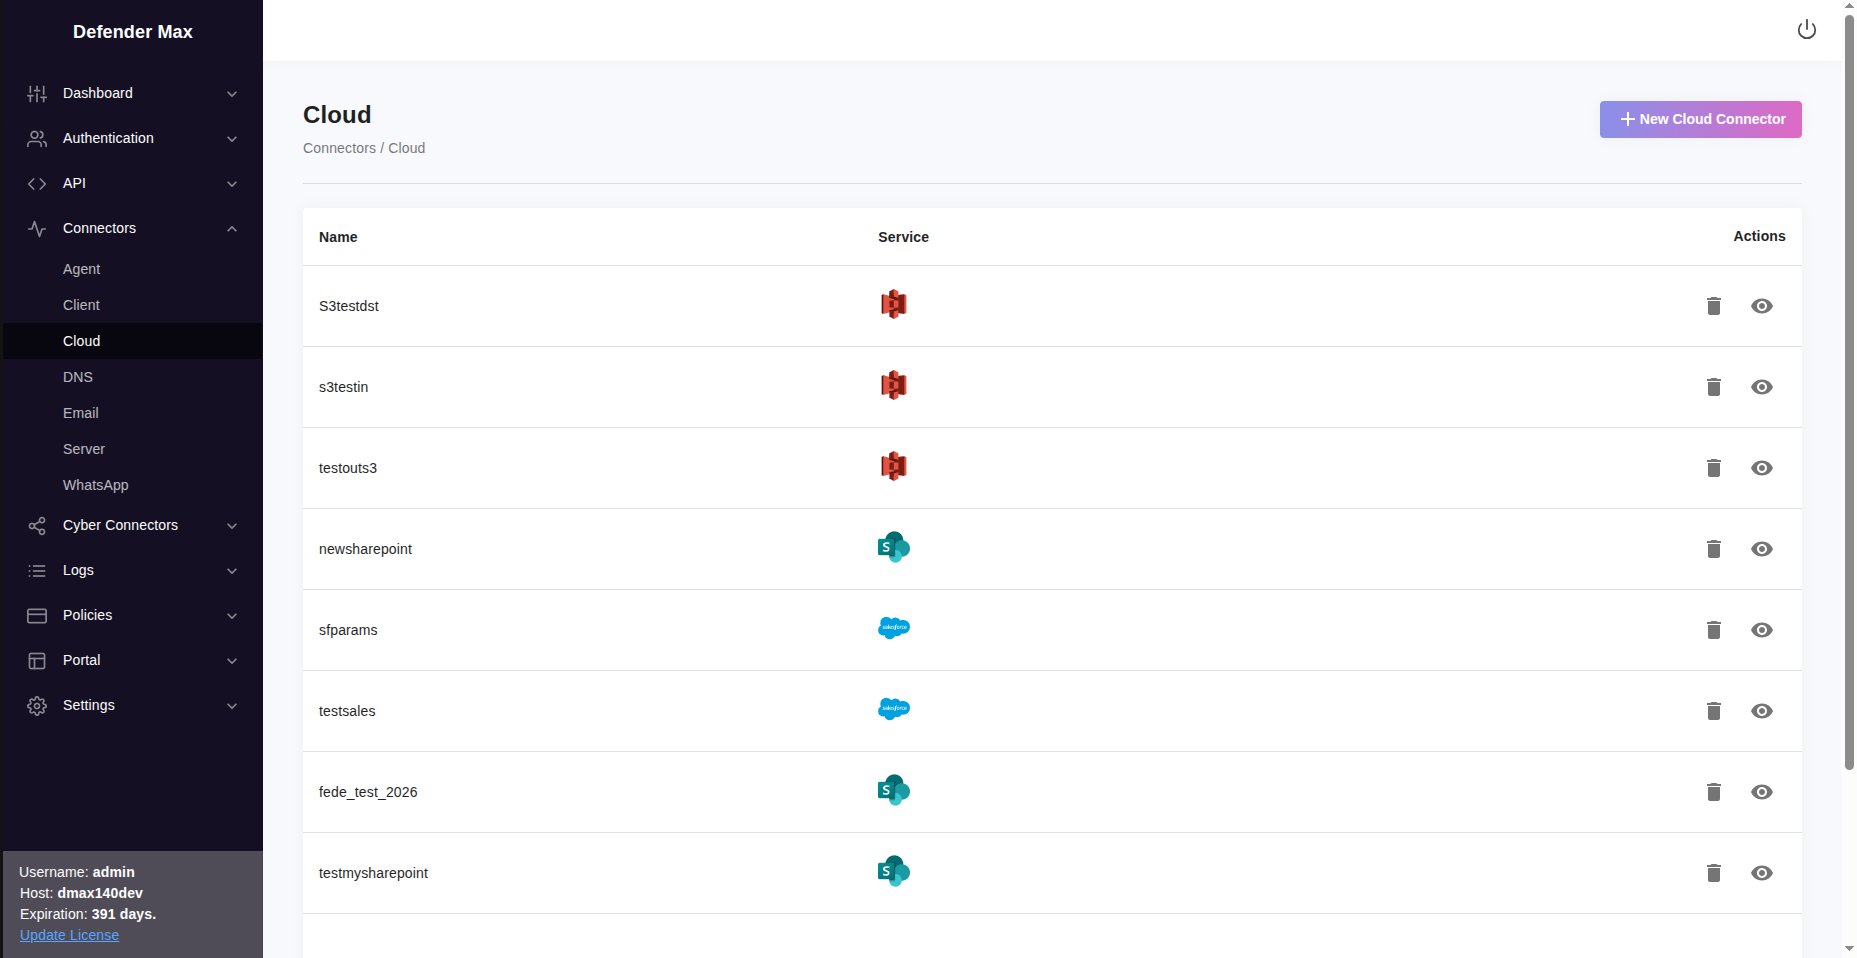
- Enter a name and specify the folder you want to monitor or upload to.
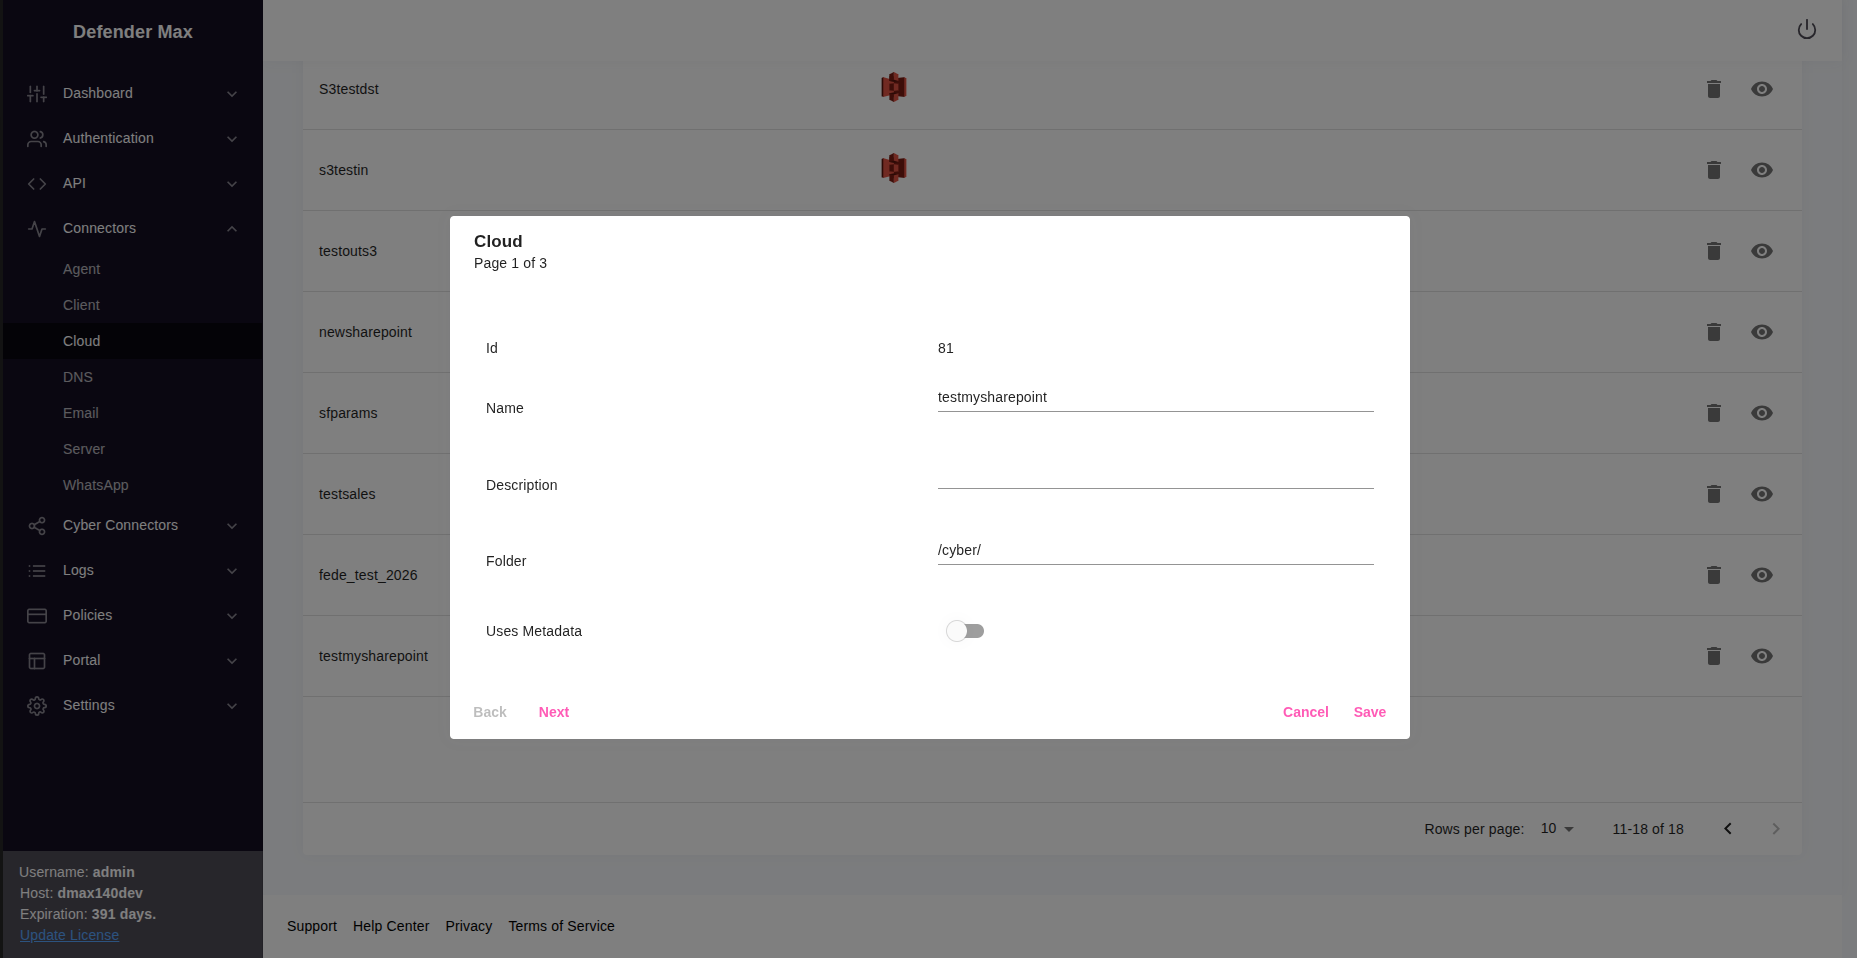
- Select SharePoint as the connector type.

- Fill in the SharePoint connection details:

| Field | Value |
|---|---|
| Tenant ID | The Directory (tenant) ID you copied from Azure |
| Client ID | The Application (client) ID you copied from Azure |
| Site URL | The URL of the SharePoint portal you want to connect to |
| Certificate | A .pfx certificate file (see below) |
- Convert the certificate to
.pfxformat (required by Dmax):
openssl pkcs12 -export -out certificate.pfx -inkey server.key -in server.crt -legacy- Upload the
certificate.pfxfile and enter the password you set during conversion. - Click Test Now to verify the connection.
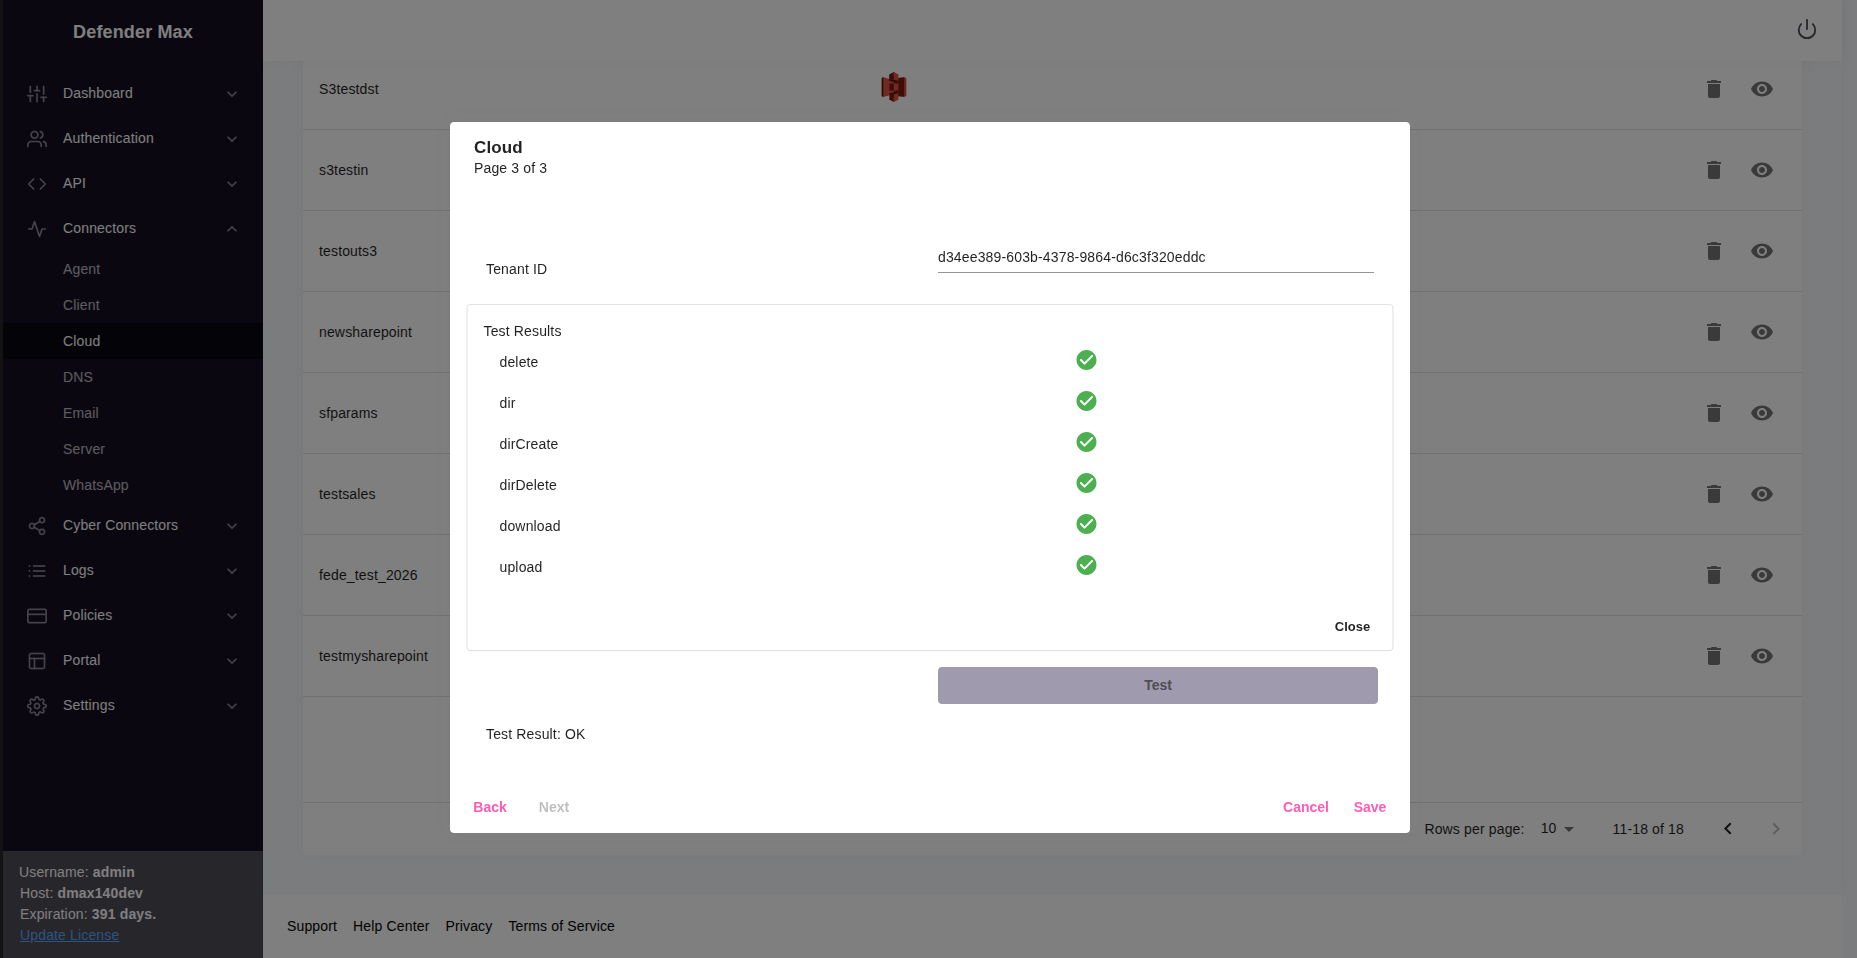
Once the test succeeds, the SharePoint connector is ready to use in your policies.
Updated 5 months ago
Did this page help you?